注:本文的原始资料和示例来自ServiceStackApps/typescript-redux ,根据我的实际情况,做了一些调整,详见文内说明,感谢原作者的无私分享。
本文通过设置,运行和探索Javascript一些高级的技术栈:
TypeScript - 具备类型的Javascript超集, 提供一些高级别的语法特性(注:真正的面向对象等)和部分ES5的支持typings - 用于搜索和安装TypeScript语法定义的包管理器React - 简单,高性能的javascript UI层框架,利用虚拟DOM和应答数据流Redux - javascript 应用程序的状态管理框架,非常适合和React搭配使用
提供开发大型javascript应用程序强大的基础,并改进在Visual Studio中的开发体验(注:事实上,并非一定在Visual Studio中,其他的编辑器也是可以的)
本文中涉及到的代码可在此处查看:https://github.com/xuanye/typescript-redux-sample
安装 TypeScript 如果你还没有从typescriptlang.org 下载安装最新版本的Typescript。Visual Studio的用户可以直接使用下面的链接快速安装:
本文已经默认你已经安装了TypeScript v1.8 或更高的版本
(注:原文中使用JSPM作为nodejs的包管理器,本文中我仍然使用npm来代替,原文中使用system作为模块加载器,本文中用webpack代替)
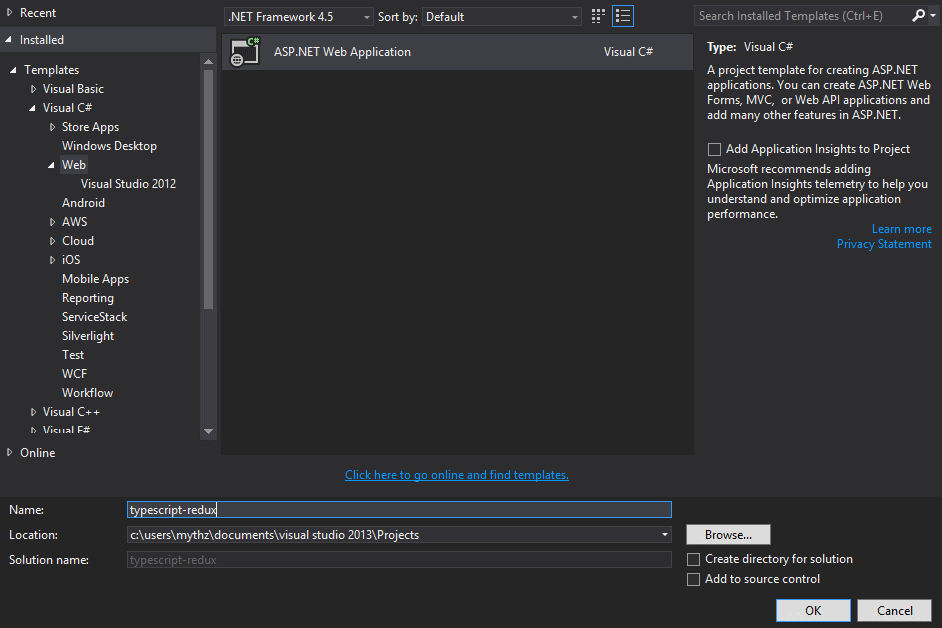
创建 一个 ASP.NET Web 项目(如果你的编辑器不是VS.NET,那就直接跳过到配置TypeScript) 虽然安装了 TypeScript VS.NET 扩展提供了,一个新的 HTML Application with TypeScript 项目模板,但是你最好还是通过创建一个 Empty ASP.NET Web Application 项目并配置项目支持Typescript – 这比把它从Typescript转换成 ASP.NET Web项目要方便的多。.
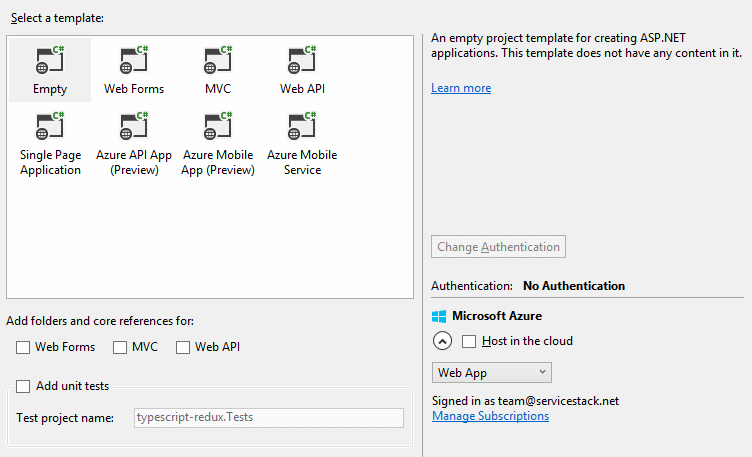
在接下来的界面 选择 Empty 模板来创建一个空模板:
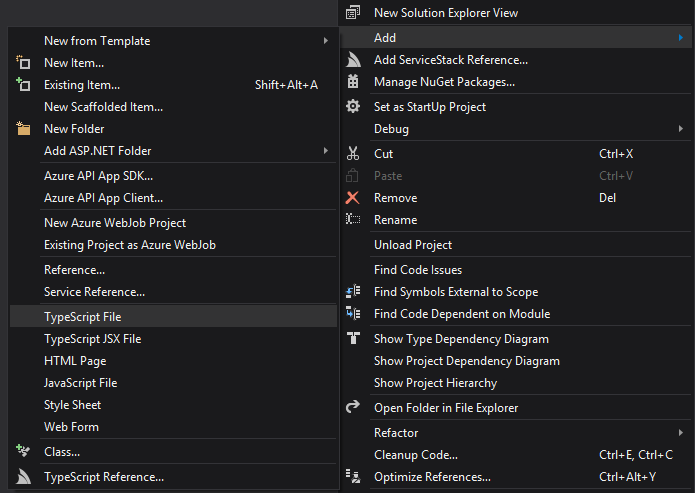
启用 TypeScript 在项目的右键菜单Add > TypeScript File中添加一个 TypeScript File 文件就会自动配置的你Web项目 .csproj 文件,加上一些启用TypeScript 支持必须的导入项:
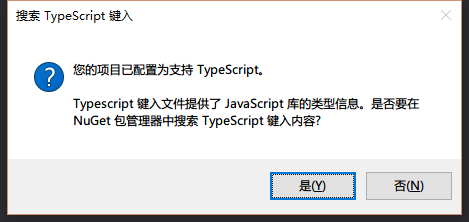
配置的时候会弹出对话框:
点击 No 来跳过使用Nuget对话框来安装Typing 定义文件,因为我们后面会使用typings Package Manager 来代替它安装定义文件.
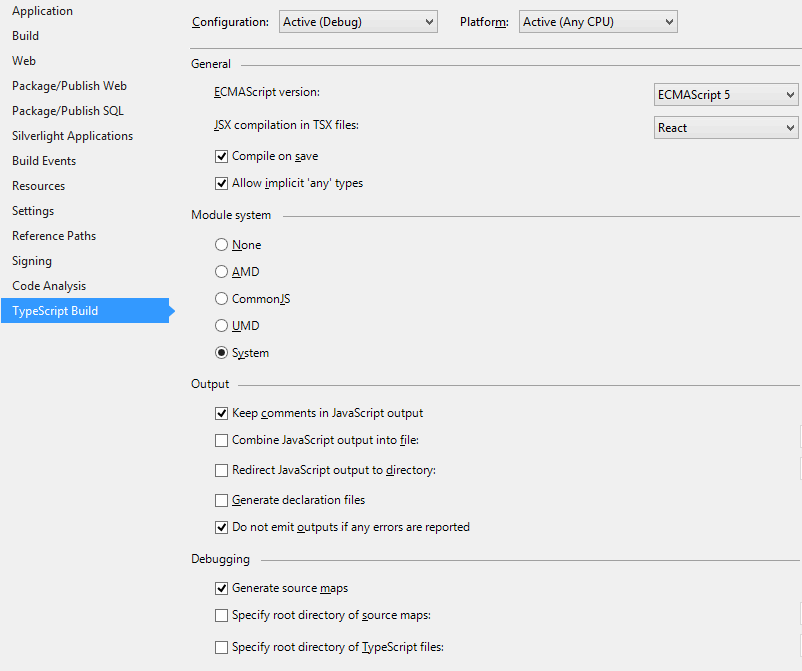
配置 TypeScript 在项目中第一激活TypeScript需要配置一些选项。VS.NET 2015 可以通过项目属性中的Typescript Build配置节来配置TypeScript的编译选项,这些信息将直接配置到VS的**.csproj**项目文件中,如下图所示:
不过我们更倾向于使用tsconfig.json的一个文本文件来配置这些选项,而且这个配置文件可以更好的适配到其他的编辑器/IDE中,更利于知识的分享,减少一些不必要的问题。
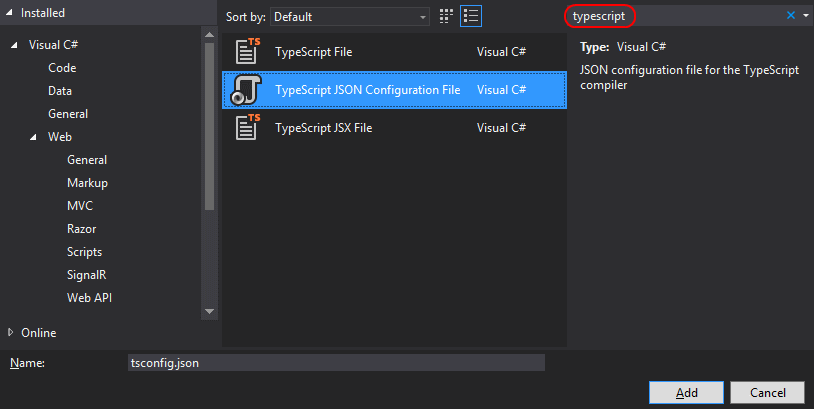
在项目上右键Add > New Item 在打开的对话框中搜索 typescript ,并选择 TypeScript JSON Configuration File 文件模板 来添加tsconfig.json 到你的项目中:
这会添加一个基础的tsconfig.json配置文件到你的项目中,这些配置会替换掉你之前在.csproj 项目文件中配置的变量
tsconfig for webpack, React and JSX 为了更快的进入状态,你可以复制下面的配置信息并替换你的tsconfig.json 文件内容:
1
2
3
4
5
6
7
8
9
10
11
12
13
14
15
16
17
18
19
{ "compilerOptions" : { "noImplicitAny" : false , "noEmitOnError" : true , "removeComments" : false , "module" : "commonjs" , "sourceMap" : true , "target" : "es5" , "jsx" : "react" , "experimentalDecorators" : true } , "exclude" : [ "typings" , "node_modules" , "wwwroot" ] }
和默认的 tsconfig.json 有所不同的是 :
target:es5 - 将编译的javascript设置成es5版本module:commonjs - 使用commonjs作为模块加载器(事实上无所谓,我们最终使用webpack打包)jsx:react - 将 .tsx 文件转换成 React的 JavaScript 语法,而不是jsx语法。experimentalDecorators:true -启用ES7装饰器语法支持,事实上这个语法规则还没有确定,所以本文中弃用了exclude:node_modules - 排除一些文件夹,不要去编译这些文件夹下面的typescript代码。
VS 2013 不支持 tsconfig.json
安装 webpack Webpack 是德国开发者 Tobias Koppers 开发的模块加载器,它和传统的commonjs和requirejs的不同之处,在于,它在运行时是不需要它本身的,js和其他一些资源文件(css,图片等)在运行之前就已经并合并到了一起,并且它的很多插件让你可以在做很多预编译的事情(比如本文中的将typescript编译成es5版本的javascript)。
事实上,我并非对它很熟悉,也只是参与了很多的资料,:) 你可以从下面的这些链接获取到一些有用的信息:
安装 webpack本身非常方便,只要使用npm命令全局安装就可以了:
C:\proj> npm install webpack -g
等待执行完成即可。
初始化项目 在项目目录下执行 npm init 为项目创建一个package.json文件,以便我们后续安装一些相关的包到本地
C:\proj> npm init
配置webpack 使用webpack 打包typescript代码,并编译成javascript需要安装一些插件,来安装一下:
C:\proj> npm install ts-loader source-map-loader --save-dev
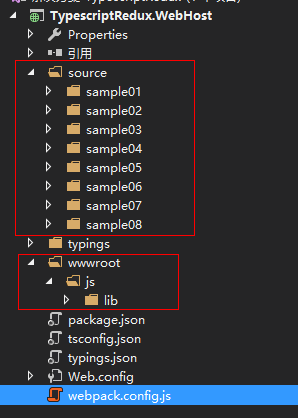
初始化项目的文件夹结构,之所以在这里说,是因为我们下面的配置文件会使用到对应的目录地址,建成后的目录结构如图所示:
其中source 目录用于存放Typescript源代码文件(本例中为了路径引用方便,我将HTML文件也放到里该目录下,实际项目中不用这么做 )wwwroot/js 用于存放生成js文件和引用的第三方类库(jquery,zepto等等)wwwroot/js/lib目录中,并在页面上单独引用。
完成后,在项目目录添加一个webpack.config.js文件,该文件是webpake的配置文件,将以下代码复制到文件中:
1
2
3
4
5
6
7
8
9
10
11
12
13
14
15
16
17
18
19
20
21
22
23
24
25
26
27
28
29
30
31
32
33
module.exports = { entry: "./source/index.ts" , output: { filename: "./wwwroot/js/[name].js" , } , devtool: "source-map" , resolve: { extensions: [ "" , ".webpack.js" , ".web.js" , ".ts" , ".tsx" , ".js" ] } , module: { loaders: [ { test: /\.tsx?$/, loader: "ts-loader" } ] , preLoaders: [ { test: /\.js$/, loader: "source-map-loader" } ] } , externals: { "react" : "React" , "react-dom" : "ReactDOM" } } ;
关于webpack.config.js中的详细说明,可参考官方的说明 ,其中externals配置节是用于排除,单独引用的reactjs类库,不打包进生成的文件,entry入口这里是示例,在下面的章节会替换成实际的内容。
安装 React 通过npm 安装 react到本地,你可以可以手动到官网下载最新的版本,并复制到wwwroot/js/lib 目录下:
C:\proj> npm install react --save
从 v0.14 开始 React 将dom操作分离到一个单独的包中,我们也来安装一下:
C:\proj> npm install react-dom --save
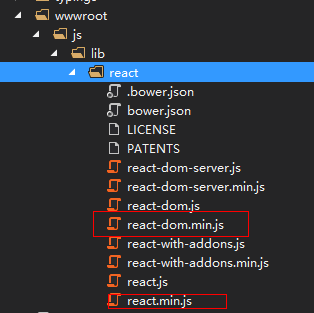
手动将react库 从node_modules 复制到 wwwroot/js/lib 目录中,如下图所示:
我们实际使用到的文件是react.min.js和react-dom.min.js 。
安装 typings - TypeScript definitions的管理器 为了能够开启Typescript的自动完成和类型检查支持,我们需要下载一些第三方类库的类型定义文件,最好的方式是通过安装typings
C:\proj> npm install typings -g
现在我们可以通过 typings 命令来安装我们需要的TypeScript 类型定义文件了。
Install React Type Definitions C:\proj> typings install react --ambient --save
Install React DOM Type Definitions C:\proj> typings install react-dom --ambient --save
The --ambient 标志是让 typings 在社区版本中查找 .d.ts TypeScript 定义文件,它们都在DefinitelyTyped --save 标志是让这些安装的信息保存到typings.json配置文件中
安装完成后你打开文件 typings/browser.d.ts 可以看到:
在其他文件中使用这些类型定义文件,只需要引用typings/browser.d.ts文件即可:
开始 用 TypeScript 编码了 太棒了! 到这里我们终于有了一个可以工作的Typescript开发环境的,可以开始编写TypeScript 和 React代码,并看看它们是否正常工作,接下来的代码按照我们之前的约定,在./source目录添加你的代码,好了,我们从一个最简单的React 示例开始吧:
在第一个示例中,我们要编写一个最简单能正常运行的应用,气死就是 Helloworldsource 目录下新建 example01/ 文件夹,并添加第一个 TypeScript 文件 :
1 2 3 4 5 6 7 8 9 10 11 import * as React from "react" ;import * as ReactDOM from "react-dom" ;class HelloWorld extends React.Component <any , any > { render ( return <div > Hello, World!</div > } } ReactDOM .render (<HelloWorld /> document .getElementById ("content" ));
这里我们来一起看一看,这个代码是怎么运行的:
先来看看第一行代码:
使用了 Reference 标签 来引用所有的之前通过typings 安装的 Definitely Typed 文件
看一下 import 语句:
1 2 import * as React from 'react' ;import * as ReactDOM from 'react-dom' ;
导入之前使用 npm 命令安装的Javascript模块 (注:Typescript中可以使用第三方Javascript库,但是必须提供类型定义文件,没有的话需要写一个), * 号表示导入整个模块,如果你希望只导入一个模块的话 ,你可以这么写:
1 import { render } from 'react-dom' ;
唯一的例外是在 .tsx文件中,必须导入 React 模块,否则在使用JSX代码块时会发生编译错误:
return <div>Hello, World!</div>; //compile error: Cannot find name React
下面的代码是创建一个组件(component)继承至 React的Component<TProps,TState>基类:
1 class HelloWorld extends React.Component <any , any > {
当我们的组件(Components) 不包含任何特定的属性( property)和状态(state)时,我们可以使用 any 类型来忽略一些特殊的类型any to ignore specifying types.
我们之前在TypeScript配置中已经启用了jsx语法支持,我们可以在**.tsx** 使用jsx语法了(注:和配置没啥关系,配置只是用来编译生成代码的,tsx天生就是支持jsx语法的)
1 2 3 render ( return <div > Hello, World!</div > }
最后一行是一个标准的React代码,它意思是在#content DOM 节点中输出我们的 HelloWorld 组件(component)的实例:
1 ReactDOM .render (<HelloWorld /> document .getElementById ("content" ));
现在,所有剩下的就是建立一个HTML页面来容纳我们的刚刚编写的组件啦(component):
1 2 3 4 5 6 7 8 9 10 11 12 13 14 15 <!DOCTYPE html > <html > <head > <title > TypeScript + React + Redux</title > </head > <body > <h1 > Example 2</h1 > <div id ="content" > </div > <script src ="../../wwwroot/js/lib/react/react.min.js" > </script > <script src ="../../wwwroot/js/lib/react/react-dom.min.js" > </script > <script src ="../../wwwroot/js/sample02.js" > </script > </body > </html >
index.html 是一个在ASP.NET中预定义的默认文档,用来让我们可以浏览之前编写的组件效果,它被安排在各个示例文件夹中,像我之前说的那样,并不是非要放在这里,只是为了更好的组织url。上述的 index.html在目录/example01/中。
首先,我们必须引入 react.min.js 和 react-dom.min.js 文件,之前有谈到过,webpack.config.js配置中设置react本身不被打包,而是单独引用。一些通用的第三方类库,为了更好的使用CDN和缓存,可以使用单独引用的方式,当然也可以打包在一起,哪种方式要看实际的情况。
1 2 3 <script src ="../../wwwroot/js/lib/react/react.min.js" > </script > <script src ="../../wwwroot/js/lib/react/react-dom.min.js" > </script >
同时我们引入了一个 sample02.js的文件,这有点奇怪,因为这个文件我们并没有创建,它这时确实也并不存在
1 <script src ="../../wwwroot/js/sample02.js" > </script >
这就是我们接下来要处理的问题,之前我们讲到我会使用 webpack 来 代替默认使用 VS.NET 2015 作为 Typescript 的编译器,sample02.js文件其实是 webpack 自动生成的文件。这个时候它不存在,是因为我们还没有配置好它,让我们重新打开webpack.config.js文件,看看里面的内容:
1 2 3 4 5 6 7 8 9 10 11 12 13 14 15 16 17 18 19 20 21 22 23 24 25 26 27 28 29 30 31 32 33 34 module.exports = { entry: { sample01: "./source/sample01/app.tsx" } , output: { filename: "./wwwroot/js/[name].js" , } , devtool: "source-map" , resolve: { extensions: [ "" , ".webpack.js" , ".web.js" , ".ts" , ".tsx" , ".js" ] } , module: { loaders: [ { test: /\.tsx?$/, loader: "ts-loader" } ] , preLoaders: [ { test: /\.js$/, loader: "source-map-loader" } ] } , externals: { "react" : "React" , "react-dom" : "ReactDOM" } } ;
和之前的内容相比,只修改了 entry 配置节,将 ./source/sample01/app.tsx 作为一个入口文件,并命名为 sample01, 而输出的目录则是 ./wwwroot/js/ 并且以入口的名字作为文件名 [name].js,所以在 index.html 我引入的文件 ../../wwwroot/js/sample02.js
1 2 3 4 5 6 entry: { sample01: "./source/sample01/app.tsx" } , output: { filename: "./wwwroot/js/[name].js" , } ,
回到 index.html 文件中
最后添加一个 <div/> 空标签元素,并设置 id 为 content 用来输出React组件。
1 <div id ="content" > </div >
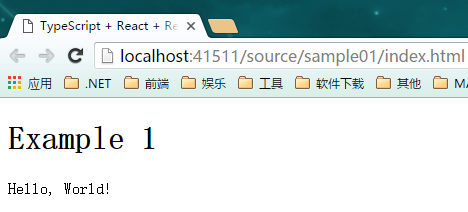
现在所有的工作做完后,我们打开浏览器直接访问/example01/来查看效果了 – 哈哈,我们第一个可运行的React应用!
Demo:/typescript-react/example01/
提示 : 我使用了 VS.NET 2015 作为开发工具,所以自带httpserver ,如果你并不是用VS.NET 2015 ,那么可以任意的 http server 工具来查看示例。
如使用node 的 http-server包
C:\proj> npm install http-server -g
然后在项目的根目录运行:
C:\proj> http-server
打开浏览器 查看 :http://localhost:8080/source/sample01/index.html
在第二个示例中,我们将尝试通过移动<HelloWorld />的实现到独立的文件中来模块化我们的应用:
1 2 3 4 5 6 7 import * as React from "react" ;export class HelloWorld extends React.Component <any , any > { render ( return <div > Hello world!It's from Helloword Component.</div > } }
为了让HelloWorld组件在外部可以被调用,我们需要使用 export 关键字。我们同样可以使用 default 关键字来定义一个默认导出 (default export ),让使用者导入的时候更加方便,并可以重命名称它们喜欢的名字,然后我们需要移除在app.tsx 中的HelloWorld实现,并用import 新组件的方式代替它:
1 2 3 4 5 6 7 8 9 / <reference path ='../../typings/browser.d.ts' /> import * as React from "react" ;import * as ReactDOM from "react-dom" ;import {HelloWorld } from "./helloworld" ;ReactDOM .render (<HelloWorld /> document .getElementById ("content" ));
如果我们使用默认导出 (default export ),那么导入的部分就是这样的:
1 import HelloWorld from './HelloWorld' ;
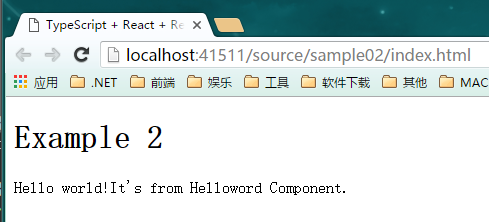
这个示例的改动非常小,我们来看一下,我们的程序是否还能正常运行。
注:这里要注意我们仍需在webpack.config.js中添加 entry ,后续的示例不再重复了
1 2 3 4 5 entry: { sample01: "./source/sample01/app.tsx" , sample02: "./source/sample02/app.tsx" } , ...
[
Demo: /typescript-redux/example02/
现在我们已经是Helloworld界的大师了,应该升级下我们的游戏规则,创建一些更高级的有状态的组件了,毕竟不能100级了,还在新手村。
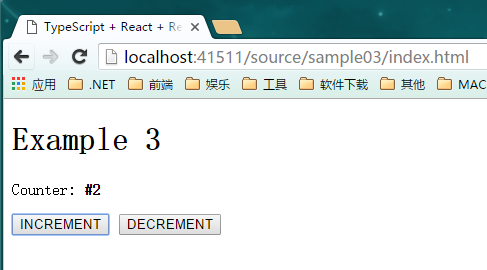
我们要做的第一件伟大的事情就是计数器,是的,我们把示例中的 helloword 文件修改文件名为 counter 并把内容修改如下:
1 2 3 4 5 6 7 8 9 10 11 12 13 14 15 16 17 18 19 20 21 22 23 24 25 26 import * as React from "react" ;export default class Counter extends React.Component <any , any > { constructor (props, context ) { super (props, context); this .state = { counter : 0 }; } render ( return ( <div > <p > <label > Counter: </label > <b > #{this.state.counter}</b > </p > <button onClick ={e => this.incr(1) }>INCREMENT</button > <span style ={{ padding: "0 5px " }} /> <button onClick ={e => this.incr(-1) }>DECREMENT</button > </div > ); } incr (by :number this .setState ({ counter : this .state .counter + by }); } }
好像没什么惊喜,我们在页面中添加了一个计数器,通过按钮 increment / decrement 来改变它的值, 实际使用的是React内置的setState()方法:
Demo: /typescript-redux/example03/
使用 Redux 使用 setState() 是在组件中改变状态的老办法了,现在比较流行的是使用 Redux ,在使用之前,我们需要安装一下:
C:\proj> npm install redux --save
同样也要安装它的定义文件 Type Definitions:
C:\proj> typings install redux --ambient --save
如果你对Redux 还不太熟悉,现在是开始的时候,下面是一些相关的问题(不过下面的网站在天朝基本都打不开):
这里推荐两个中文在线文档吧,虽然也经常打不开:
Redux 是 JavaScript 状态容器,提供可预测化的状态管理。
可以让你构建一致化的应用,运行于不同的环境(客户端、服务器、原生应用),并且易于测试。不仅于此,它还提供 超爽的开发体验,比如有一个时间旅行调试器可以编辑后实时预览。
Redux 除了和 React 一起用外,还支持其它界面库。
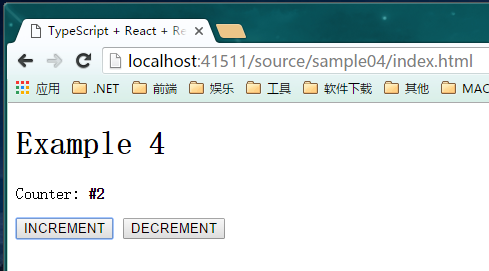
现在我们知道Redux 是什么了,让我们开始改造我们的计数器:
1 2 3 4 5 6 7 8 9 10 11 12 13 14 15 16 17 18 19 20 21 22 23 24 25 26 27 28 29 30 31 32 33 34 35 36 import * as React from 'react' ;import { createStore } from 'redux' ;let store = createStore ( (state, action ) => { switch (action.type ) { case 'INCR' : return { counter : state.counter + action.by }; default : return state; } }, { counter : 0 }); export default class Counter extends React.Component <any , any > { private unsubscribe : Function ; componentDidMount ( this .unsubscribe = store.subscribe (() => this .forceUpdate ()); } componentWillUnmount ( this .unsubscribe (); } render ( return ( <div > <p > <label > Counter: </label > <b > #{store.getState().counter}</b > </p > <button onClick ={e => store.dispatch({ type:'INCR', by: 1 }) }>INCREMENT</button > <span style ={{ padding: "0 5px " }} /> <button onClick ={e => store.dispatch({ type:'INCR', by: -1 }) }>DECREMENT</button > </div > ); } }
创建一个 Redux Store 引用redux 模块的 createStore方法,并创建一个Redux store ,并传递默认的state:
1 2 3 4 5 6 7 8 9 10 11 12 import { createStore } from 'redux' ;let store = createStore ( (state, action ) => { switch (action.type ) { case 'INCR' : return { counter : state.counter + action.by }; default : return state; } }, { counter : 0 });
因为我们的计数器只有一个Action ,我们的reducer(Redux中的专有名词,即处理Action的函数)的实现就比较简单 - 返回更新的计数器对象
另外一件我们需要知道的关于Redux的事情是Redux是独立于React的,并不像 setState() 那样内置在其中的。React并不知道什么时候你的Redux Store中的State发生了变化–其实是需要知道的,因为你的组件要知道什么时候需要重绘。因为这个,我们需要注册一个监听器来观察 store的state变化来强制触发组件的重绘:
1 2 3 4 5 6 7 8 private unsubscribe : Function ;componentDidMount ( this .unsubscribe = store.subscribe (() => this .forceUpdate ()); } componentWillUnmount ( this .unsubscribe (); }
我们还需要将修改组件通过store.getState() 方法读取它的state信息,并修改之前的内置方式setState()方法为触发一个Action来修改我们应用的state 。
1 2 3 4 5 6 7 8 9 10 11 12 render ( return ( <div > <p > <label > Counter: </label > <b > #{store.getState().counter}</b > </p > <button onClick ={e => store.dispatch({ type:'INCR', by: 1 }) }>INCREMENT</button > <span style ={{ padding: "0 5px " }} /> <button onClick ={e => store.dispatch({ type:'INCR', by: -1 }) }>DECREMENT</button > </div > ); }
现在我们的计数器已经”Redux化”了,重新运行一下示例,并看看和之前的效果是否一致?
Demo: /typescript-redux/example04/
安装 React Redux 在上一个示例中,我们在Counter模块中创建了 Redux store 来帮助我们优化代码。因为你的应用应该只有一个Store,所以这不是一个正确使用它的方式 (关于这个原则,你需要参看Redux的相关文档),我们使用Redux的React帮助库来帮我们改善这种情况。
事实上,当我们结合Redux和React的时候,我们必须安装的一个包就是react-redux,它同样可以通过 npm 方式安装
C:\proj> npm install react-redux --save
和大多数流行的类库一样,它也已经有了类型定义文件了,一起来安装一下吧:
C:\proj> typings install react-redux --ambient --save
在这个示例中,我们将 Redux store 移动到上一层的app.tsx 文件中,就像这样
1 2 3 4 5 6 7 8 9 10 11 12 13 14 15 16 17 18 19 20 21 22 23 import * as React from "react" ;import * as ReactDOM from "react-dom" ;import { createStore } from "redux" ;import { Provider } from "react-redux" ;import Counter from "./counter" ;let store = createStore ( (state, action ) => { switch (action.type ) { case 'INCR' : return { counter : state.counter + action.by }; default : return state; } }, { counter : 0 }); ReactDOM .render ( <Provider store ={store} > <Counter /> </Provider > , document .getElementById ("content" ));
为了传递store到我们的组件中,我们使用了React’s child context 特性 , 在 react-redux 封装了 <Provider/>组件 ,我们直接使用就可以了。
为了让React知道 我们希望把store注入到我们的 Counter 组件中,我们还需要定义个静态的contextTypes 属性 制定context中需要的内容:
1 2 3 4 5 6 7 8 9 10 11 12 13 14 15 16 17 18 19 20 21 22 23 24 25 26 27 import * as React from 'react' ;export default class Counter extends React.Component <any , any > { context : any ; static contextTypes = { store : React .PropTypes .object } private unsubscribe : Function ; componentDidMount ( this .unsubscribe = this .context .store .subscribe (() => this .forceUpdate ()); } componentWillUnmount ( this .unsubscribe (); } render ( return ( <div > <p > <label > Counter: </label > <b > #{this.context.store.getState().counter}</b > </p > <button onClick ={e => this.context.store.dispatch({ type:'INCR', by: 1 }) }>INCREMENT</button > <span style ={{ padding: "0 5px " }} /> <button onClick ={e => this.context.store.dispatch({ type:'INCR', by: -1 }) }>DECREMENT</button > </div > ); } }
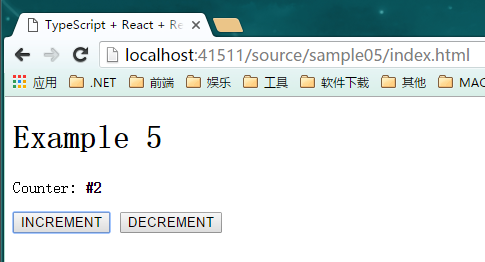
改动对页面没什么影响,我们的程序应该还是可以正常运行:
Demo: /typescript-redux/example05/
我们已经编写了一些示例程序,现在哦我们回过头来重新看看一下。在上一个例子中,我们看到我们可以通过 Provider 组件来传递 state到我们的子组件,react-redux 同样也提供了一些其他的方式。
Redux的 connect() 函数返回一个更高级别的组件,它可以让组件变得无状态(stateless), 通过将state和callback函数映射到组件的属性上(properties)以降低组件和Redux Store的耦合度:
1 2 3 4 5 6 7 8 9 10 11 12 13 14 15 16 17 18 19 20 21 22 23 24 25 26 27 28 29 30 31 import * as React from 'react' ;import { connect } from 'react-redux' ;class Counter extends React.Component <any , any > { render ( return ( <div > <p > <label > Counter: </label > <b > #{this.props.counter}</b > </p > <button onClick ={e => this.props.incr() }>INCREMENT</button > <span style ={{ padding: "0 5px " }} /> <button onClick ={e => this.props.decr() }>DECREMENT</button > </div > ); } } const mapStateToProps = (state ) => state;const mapDispatchToProps = (dispatch ) => ({ incr : () => { dispatch ({ type : 'INCR' , by : 1 }); }, decr : () => { dispatch ({ type : 'INCR' , by : -1 }); } }); export default connect (mapStateToProps, mapDispatchToProps)(Counter );
为了达到这个效果,我们通过传递一个 mapStateToProps 的函数 ,这个函数返回一个对象,这个对象包含组件所需要的所有状态(state)。mapDispatchToProps 的函数,这个函数通过调用,将组织需要传递到Redux action的参数,并触发对应在store中注册的Reduce。
Redux的 connect() 会将上述函数组合到一个更高一级的组件中,并订阅Redux store的变化,通过更新state来改变组件的属性并重绘(实际上的子组件) Counter 组件
这些修改对页面来说仍然是透明的,你可以打开并重新试试它的功能
Demo: /typescript-redux/example06/
安装 es6-shim 原文中的这个章节是为了合并对象,安装es6-shim,并使用其中的 Object.assign() 方法,我从 Object.assign() 这里复制了Polyfill如下,而没有使用 es6-shim ,如下代码所示:
1 2 3 4 5 6 7 8 9 10 11 12 13 14 15 16 17 18 19 20 21 22 23 if (typeof Object .assign != 'function' ) { (function ( Object .assign = function (target ) { 'use strict' ; if (target === undefined || target === null ) { throw new TypeError ('Cannot convert undefined or null to object' ); } var output = Object (target); for (var index = 1 ; index < arguments .length ; index++) { var source = arguments [index]; if (source !== undefined && source !== null ) { for (var nextKey in source) { if (source.hasOwnProperty (nextKey)) { output[nextKey] = source[nextKey]; } } } } return output; }; })(); }
我们的下一个例子 我们将扩展Redux创建一个更大,更高级的真实的应用程序,通过这个例子进一步探索它的好处。因为这个世界不需要另外一个TodoMVC 应用了,所以我计划创建另外一个形状生成应用代替,它提供更多的视角去观察状态的变化。
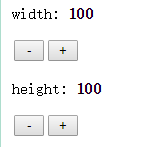
我们将开始创建通过计数器(Counter)来控制控件的宽度和高度,为了达到这效果,需要重构一下我们的 Counter 组件,定义个field的属性来确定应该修改哪个状态(width/height),让其变得更加可复用。另外再增加一个 step 的属性来控制变化的尺度。
因为我们要发送多个Action,所以我们要适修改一下我们的Action Type名字,这里我们使用{Type}_{Event}格式来重命名它们,所以计数器的Action变成了COUNTER_CHANGE
1 2 3 4 5 6 7 8 9 10 11 12 13 14 15 16 17 18 19 20 21 22 23 24 25 26 27 28 29 30 31 import * as React from 'react' ;import { connect } from 'react-redux' ;class Counter extends React.Component <any , any > { render ( var field = this .props .field , step = this .props .step || 1 ; return ( <div > <p > <label > {field}: </label > <b > {this.props.counter}</b > </p > <button style ={{width:30, margin:2 }} onClick ={e => this.props.decr(field, step)}>-</button > <button style ={{width:30, margin:2 }} onClick ={e => this.props.incr(field, step)}>+</button > </div > ); } } const mapStateToProps = (state, props ) => ({ counter : state[props.field ] || 0 });const mapDispatchToProps = (dispatch ) => ({ incr : (field, step ) => { dispatch ({ type : 'COUNTER_CHANGE' , field, by : step }); }, decr : (field, step ) => { dispatch ({ type : 'COUNTER_CHANGE' , field, by : -1 * step }); } }); export default connect (mapStateToProps, mapDispatchToProps)(Counter );
现在它变得可以复用了,我们可以创建多个实例来控制我们形状的Width和Height了:
1 2 <Counter field ="width" step ={10} /> <Counter field ="height" step ={10} />
它看上去就像这样:
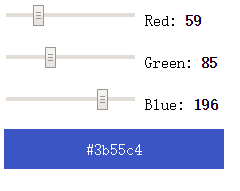
下一个组件我们需要一个控制颜色的组件,range INPUT 控件非常适合作为基础颜色调节器的空间,类似一个滑动条(这个控件在IE的老版本上没有办法识别,请大家不要用IE看),同时需要一个显示颜色的区域,唯一不寻常的事情是需要一个计算颜色亮度的函数用来区分是否显示白色或者黑色的前台文本 。
并且<ColorPicker /> 是一个单纯的React控件,对Redux没有任何的依赖,所以稍后我们需要把它包装进一个更高级别的组件中:
1 2 3 4 5 6 7 8 9 10 11 12 13 14 15 16 17 18 19 20 21 22 23 24 25 26 27 28 29 30 31 32 33 34 35 36 37 38 39 40 41 42 43 44 45 46 47 48 49 50 51 52 53 54 55 56 57 58 59 60 61 62 63 64 65 66 67 68 69 70 71 72 73 74 75 76 77 78 import * as React from 'react' ;export class NumberPicker extends React.Component <any , any > { render ( return ( <p > <input type ="range" value ={this.props.value.toString() } min ="0" max ="255" onChange ={e => this.handleChange(e) } /> <label > {this.props.name}: </label > <b > { this.props.value }</b > </p > ); } handleChange (event ) { const e = event.target as HTMLInputElement ; this .props .onChange (parseInt (e.value )); } } export class ColorPicker extends React.Component <any , any > { render ( const color = this .props .color ; const rgb = hexToRgb (color); const textColor = isDark (color) ? '#fff' : '#000' ; return ( <div > <NumberPicker name ="Red" value ={rgb.r} onChange ={n => this.updateRed(n)} /> <NumberPicker name ="Green" value ={rgb.g} onChange ={n => this.updateGreen(n) } /> <NumberPicker name ="Blue" value ={rgb.b} onChange ={n => this.updateBlue(n) } /> <div style ={{ background: color , width: "100 %", height: 40 , lineHeight: "40px ", textAlign: "center ", color: textColor }}> {color} </div > </div > ); } updateRed (n : number const rgb = hexToRgb (this .props .color ); this .changeColor (rgbToHex (n, rgb.g , rgb.b )); } updateGreen (n : number const rgb = hexToRgb (this .props .color ); this .changeColor (rgbToHex (rgb.r , n, rgb.b )); } updateBlue (n : number const rgb = hexToRgb (this .props .color ); this .changeColor (rgbToHex (rgb.r , rgb.g , n)); } changeColor (color : string this .props .onChange (color); } } const componentToHex = (c ) => { const hex = c.toString (16 ); return hex.length == 1 ? "0" + hex : hex; }; const rgbToHex = (r, g, b ) => "#" + componentToHex (r) + componentToHex (g) + componentToHex (b);const hexToRgb = (hex : string ): { r : number ; g : number ; b : number ; } => { const result = /^#?([a-f\d]{2})([a-f\d]{2})([a-f\d]{2})$/i .exec (hex); return result ? { r : parseInt (result[1 ], 16 ), g : parseInt (result[2 ], 16 ), b : parseInt (result[3 ], 16 ) } : null ; }; const luminance = (color : string const rgb = hexToRgb (color); return 0.2126 * rgb.r + 0.7152 * rgb.g + 0.0722 * rgb.b ; }; export const isDark = (color : string luminance (color) < 100 ;
在界面上看起来像这样:
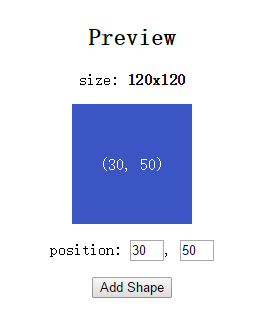
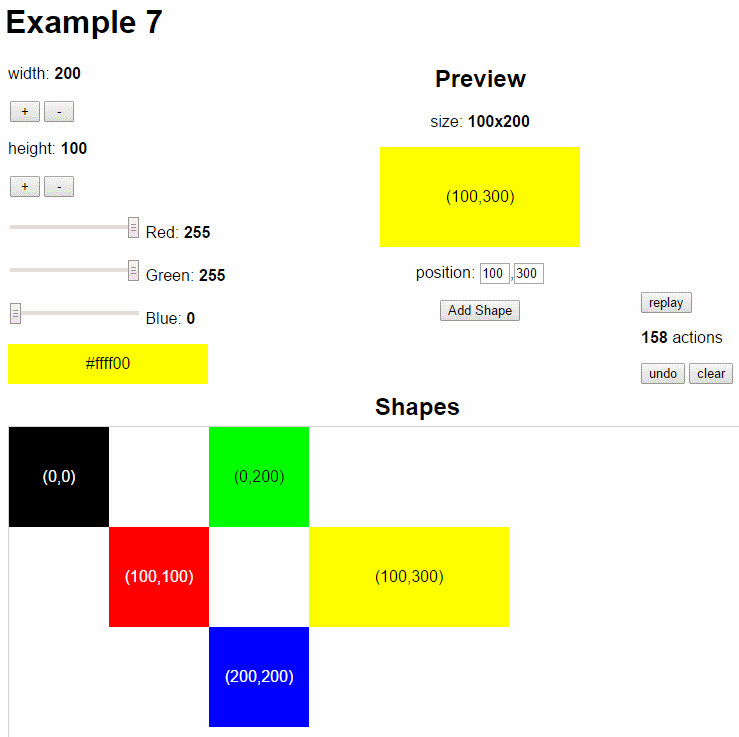
这就是我们的Shape 生成器,引入了更多的状态,我们将关注 top 和left 的位置来确定他在预览区域显示的位置,同时控制它的颜色和大小,同时也非常重要的是我们加了一个 Add Shape 的按钮,把Shape添加到我们的预览区域中,详细的代码如下:
1 2 3 4 5 6 7 8 9 10 11 12 13 14 15 16 17 18 19 20 21 22 23 24 25 26 27 28 29 30 31 32 33 34 35 36 37 38 39 40 41 42 43 44 45 46 47 48 49 50 51 52 53 54 55 56 57 58 59 import * as React from "react" ;import { connect } from "react-redux" ;import { isDark } from "./colorpicker" ;class ShapeMaker extends React.Component <any , any > { constructor (props?, context? ) { super (props, context); this .state = { top : props.top , left : props.left }; } render ( var width = this .props .width , height = this .props .height , background = this .props .color ; const color = isDark (background) ? '#fff' : '#000' ; return ( <div > <p > <label > size: </label > <b > {height}x{width}</b > </p > <div style ={{ height , width , background , color , lineHeight: height + "px ", margin: "auto " }}> ({this.state.top}, {this.state.left}) </div > <div > <p > <label > position: </label > <input style ={{ width: 30 }} defaultValue ={this.props.top} onChange ={e => this.handleTop(e) } /> <span > , </span > <input style ={{ width: 30 }} defaultValue ={this.props.left} onChange ={e => this.handleLeft(e) } /> </p > <button onClick ={e => this.props.addShape(background, height, width, this.state.top, this.state.left) }> Add Shape </button > </div > </div > ); } handleTop (e ) { var top = parseInt (e.target .value ); if (!isNaN (top)) this .setState ({ top }); } handleLeft (e ) { var left = parseInt (e.target .value ); if (!isNaN (left)) this .setState ({ left }); } } export default connect ( (state ) => ({ width : state.width , height : state.height , color : state.color , top : state.nextShapeId * 10 , left : state.nextShapeId * 10 }), (dispatch ) => ({ addShape : (color, height, width, top, left ) => { dispatch ({ type : 'SHAPE_ADD' , height, width, color, top, left }); } }) )(ShapeMaker );
在界面上看起来像这样:
基于消息的Actions 有趣的是,尽管这个组件的改动部分貌似很多,不过它仅仅触发一个单独的SHAPE_ADD Action。基于消息的设计 。SHAPE_ADD actions,并且把它们存储到localStorage等以便我们后续重置,甚至通知到别人,再在其本地重现过程。
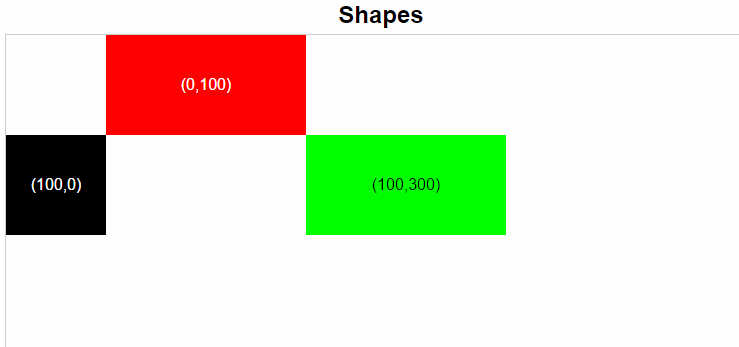
现在我已经有了创建一个Shape的所有部分,我们还需要一个组件去显示他们,ShapeViewer 通过输出一个 DIV显示添加Shape的大小,颜色和未知。
1 2 3 4 5 6 7 8 9 10 11 12 13 14 15 16 17 18 19 20 21 22 23 24 25 26 27 28 29 30 31 32 33 34 35 36 37 38 39 40 41 42 43 44 45 46 47 48 49 50 51 52 53 54 55 56 57 58 59 import * as React from "react" ;import { connect } from "react-redux" ;import { isDark } from "./colorpicker" ;class ShapeMaker extends React.Component <any , any > { constructor (props?, context? ) { super (props, context); this .state = { top : props.top , left : props.left }; } render ( var width = this .props .width , height = this .props .height , background = this .props .color ; const color = isDark (background) ? '#fff' : '#000' ; return ( <div > <p > <label > size: </label > <b > {height}x{width}</b > </p > <div style ={{ height , width , background , color , lineHeight: height + "px ", margin: "auto " }}> ({this.state.top}, {this.state.left}) </div > <div > <p > <label > position: </label > <input style ={{ width: 30 }} defaultValue ={this.props.top} onChange ={e => this.handleTop(e) } /> <span > , </span > <input style ={{ width: 30 }} defaultValue ={this.props.left} onChange ={e => this.handleLeft(e) } /> </p > <button onClick ={e => this.props.addShape(background, height, width, this.state.top, this.state.left) }> Add Shape </button > </div > </div > ); } handleTop (e ) { var top = parseInt (e.target .value ); if (!isNaN (top)) this .setState ({ top }); } handleLeft (e ) { var left = parseInt (e.target .value ); if (!isNaN (left)) this .setState ({ left }); } } export default connect ( (state ) => ({ width : state.width , height : state.height , color : state.color , top : state.nextShapeId * 10 , left : state.nextShapeId * 10 }), (dispatch ) => ({ addShape : (color, height, width, top, left ) => { dispatch ({ type : 'SHAPE_ADD' , height, width, color, top, left }); } }) )(ShapeMaker );
当添加一个Shape,ShapeViewer就会一个空DIV容器中绘制它。
拖拽 shapes 来产生Actions 为了更好的查看所有的Shape,ShapeViewer 包括了支持拖拽来更新shape的位置的功能,这也是一个快速产生大量Action的一个方法,可以快速的可视化并播放一系列state的变化
为了简单起见,使用了mousemove事件而不是drag drop 的api云云
现在我们已经实现了我们App的所有功能,可以开始Redux的特别功能
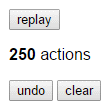
replayActions 如果你已经正确的完成我们的应用,我理论上可以通过重置Redux的Store到它的默认状态,然后再次触发之前的每一个Action来重现我们整个应用的会话。这就是 replayActions 要实现的功能。每个Action我们提供10毫秒*第几个的间隔来播放。
1 2 3 4 5 6 7 8 9 10 11 12 13 14 15 16 17 18 19 20 21 22 23 24 25 26 27 28 29 30 31 32 33 34 35 36 37 38 39 import * as React from "react" ;export default class ActionPlayer extends React.Component <any , any > { private unsubscribe : Function ; componentDidMount ( this .unsubscribe = this .props .store .subscribe (() => this .forceUpdate ()); } componentWillUnmount ( this .unsubscribe (); } render ( return ( <div > <button onClick ={e => this.replayActions() }>replay</button > <p > <b > {this.props.actions.length}</b > actions </p > <button onClick ={e => this.undoAction() }>undo</button > <span > </span > <button onClick ={e => this.resetState() }>clear</button > </div > ); } resetState ( this .props .store .dispatch ({ type : "LOAD" , state : this .props .defaultState }); this .props .actions .length = 0 ; } replayActions ( const snapshot = this .props .actions .slice (0 ); this .resetState (); snapshot.forEach ((action, i ) => setTimeout (() => this .props .store .dispatch (action), 10 * i)); } undoAction ( const snapshot = this .props .actions .slice (0 , this .props .actions .length - 1 ); this .resetState (); snapshot.forEach (action =>this .props .store .dispatch (action)); } }
ActionPlayer 也显示有多少个Action被触发了:
resetState 清空我们的应用回到最原始的状态不能再简单了,就只有重新加载defaultState并清除保存的actions。
undoAction 因为我们的应用捕获了所有的Action,撤销的动作,我们是通过将之前的所有Action重新再执行一遍,但不包括最后一个的方式来实现。这看上去效率很低,不过Javascript的VM 性能还不错,所以看上去也还好–就像我们真的实现了撤销一样:)
在实现了所有的模块之后,剩下的一件事情就是我们父容器了,用于挂载所有的组件和Redux Reducer函数,实现所有action的状态转换
Application Reducers 通过switch状态来处理每个action的type属性是实现reducer函数的经典方式。不能用对象展开方法,使用Object.assign() 也许是最好的方式了,但是它是ES6的特性,并非所有的浏览器都支持。为此我们之前有介绍安装工具包或者使用polyfill来实现,在本文的示例中使用了polyfill。{}。
我们看到我们不需要一个特殊的Redux函数去做这个事情,我们通过在action消息中传递一个简单的参数,就能轻易地让我们的reducer函数返回期望的state。
1 2 3 4 5 6 7 8 9 10 11 12 13 14 15 16 17 18 19 20 21 22 23 24 25 26 27 28 29 30 31 32 33 34 35 36 37 38 39 40 41 42 43 44 45 46 47 48 49 50 51 52 53 54 55 56 57 58 59 60 61 62 63 64 65 66 67 68 69 70 71 72 73 74 75 76 77 78 79 80 81 82 83 84 import * as React from "react" ;import * as ReactDOM from "react-dom" ;import { createStore } from "redux" ;import { Provider , connect } from "react-redux" ;import Counter from "./counter" ;import ActionPlayer from "./actionplayer" ;import ShapeMaker from "./shapemaker" ;import ShapeViewer from "./shapeviewer" ;import { ColorPicker } from "./colorpicker" ;import "./objectassign" ;var actions = [];var defaultState = { nextShapeId : 0 , width : 100 , height : 100 , color : "#000000" , shapes : [] };let store = createStore ( (state, action ) => { actions.push (action); let shape; switch (action.type ) { case "COUNTER_CHANGE" : return Object .assign ({}, state, { [action.field ]: state[action.field ] + action.by }); case "COLOR_CHANGE" : return Object .assign ({}, state, { color : action.color }); case "SHAPE_ADD" : const id = state.nextShapeId ; shape = Object .assign ({}, { id : id }, action); delete shape["type" ]; return Object .assign ({}, state, { nextShapeId : id + 1 , shapes : [...state.shapes , shape] }); case "SHAPE_CHANGE" : shape = Object .assign ({}, state.shapes .filter (x =>id === action.id )[0 ], { top : action.top , left : action.left }); return Object .assign ({}, state, { shapes : [...state.shapes .filter (x =>id !== action.id ), shape] }); case "LOAD" : return action.state ; default : return state; } }, defaultState); class ColorWrapperBase extends React.Component <any , any > { render ( return <ColorPicker color ={this.props.color} onChange ={this.props.setColor} /> } } const ColorWrapper = connect ( (state ) => ({ color : state.color }), (dispatch ) => ({ setColor : (color ) => dispatch ({ type : 'COLOR_CHANGE' , color }) }) )(ColorWrapperBase ); ReactDOM .render ( <Provider store ={store} > <table > <tbody > <tr > <td style ={{ width: 220 }}> <Counter field ="width" step ={10} /> <Counter field ="height" step ={10} /> <ColorWrapper /> </td > <td style ={{ verticalAlign: "top ", textAlign: "center ", width: 500 }}> <h2 > Preview</h2 > <ShapeMaker /> </td > <td style ={{ verticalAlign: 'bottom ' }}> <ActionPlayer store ={store} actions ={actions} defaultState ={defaultState} /> </td > </tr > <tr > <td colSpan ={3} > <h2 style ={{ margin: 5 , textAlign: 'center ' }}> Shapes</h2 > <ShapeViewer /> </td > </tr > </tbody > </table > </Provider > , document .getElementById ("content" ));
现在我们可以看到一个可工作的Shape生成器了,这是它的全貌:
Demo: /typescript-redux/example07/
有一点需要指出我们的顶级App只会绘制一次,因为它不包含在任何一个父组件,也没有调用setState()来改变state并触发重绘。所以我们需要包装一下我们的ColorPicker进一个Redux-aware ColorWrapper ,并且映射我们的Redux state到它的组件属性中,同样把onChange 转会成触发适当的Redux action
重构 Reducers 原文中重构Reducers是使用了Typescript的一些高级特性,如装饰器等,但是我本身是拒绝这么做的,毕竟装饰器还是实验性的特性,将来会发生变化,switch拆分到不同的reducer函数中:
1 2 3 4 5 6 7 8 9 10 11 12 13 14 15 16 17 18 19 20 21 22 23 24 25 26 let store = createStore ( (state, action ) => { actions.push (action); let shape; switch (action.type ) { case "COUNTER_CHANGE" : return Object .assign ({}, state, { [action.field ]: state[action.field ] + action.by }); case "COLOR_CHANGE" : return Object .assign ({}, state, { color : action.color }); case "SHAPE_ADD" : const id = state.nextShapeId ; shape = Object .assign ({}, { id : id }, action); delete shape["type" ]; return Object .assign ({}, state, { nextShapeId : id + 1 , shapes : [...state.shapes , shape] }); case "SHAPE_CHANGE" : shape = Object .assign ({}, state.shapes .filter (x =>id === action.id )[0 ], { top : action.top , left : action.left }); return Object .assign ({}, state, { shapes : [...state.shapes .filter (x =>id !== action.id ), shape] }); case "LOAD" : return action.state ; default : return state; } }, defaultState);
这里没有使用Redux内置的 combineReducers 来帮助我们模块化Reduxer,
app.tsx :
1 2 3 4 5 6 7 8 9 10 11 12 13 14 15 16 import reducers from './reducers' ;... let store = createStore ( (state, action ) => { var reducer = reducers[action.type ]; var nextState = reducer != null ? reducer (state, action) : state; if (action.type !== 'LOAD' ) history.add (action, nextState); return nextState; }, defaultState);
reducers 模块就是返回一个action.type为key的字典对象,内容则是它们对应的处理函数 :
1 2 3 4 5 6 7 8 9 10 11 12 13 14 15 16 17 18 import "./objectassign" ;import { addShape, changeShape } from './reducers/shapeReducers' ;const changeCounter = (state, action ) => Object .assign ({}, state, { [action.field ]: state[action.field ] + action.by }); const changeColor = (state, action ) => Object .assign ({}, state, { color : action.color }); export default { COUNTER_CHANGE : changeCounter, COLOR_CHANGE : changeColor, SHAPE_ADD : addShape, SHAPE_CHANGE : changeShape, LOAD : (state, action ) => action.state };
使用命名函数让代码更具可读性并且让你独立地开发和测试每个reducer的实现。
1 2 3 4 5 6 7 8 9 10 11 12 13 14 import "../objectassign" ;export const addShape = (state, action ) => { var id = state.nextShapeId ; var shape = Object .assign ({}, { id : id }, action); delete shape['type' ]; return Object .assign ({}, state, { nextShapeId : id + 1 , shapes : [...state.shapes , shape] }); }; export const changeShape = (state, action ) => { var shape = Object .assign ({}, state.shapes .filter (x =>id === action.id )[0 ], { top : action.top , left : action.left }); return Object .assign ({}, state, { shapes : [...state.shapes .filter (x =>id !== action.id ), shape] }); };
重构 Redux 的组件 这里还有一些事情需要我们去改进Redux-connected的组件,这些组件使用了connect()来创建我们更高级别的(其实是子类)Redux-connected 组件:
1 2 3 4 5 6 7 8 9 10 11 class ColorWrapperBase extends React.Component <any , any > { render ( return <ColorPicker color ={this.props.color} onChange ={this.props.setColor} /> } } export const ColorWrapper = connect ( (state ) => ({ color : state.color }), (dispatch ) => ({ setColor : (color ) => dispatch ({ type : "COLOR_CHANGE" , color }) }) )(ColorWrapperBase );
注:原文中作者说不喜欢通过这种方式(离开组件类声明,去改变组件的行为)来改变原来组件的实现,然后再接下来的章节中,叙述如果通过Typescript的装饰器功能来改造,但是我暂时并不同意这种观点,在Typescript中装饰器本身是比较晦涩的语法糖,而且还只是实验性的功能特性,在我们还没有非常熟练掌握的情况下,还是应该谨慎处理,而且我还觉得使用connect()的方式,并没有什么不妥。如果你对装饰器的部分非常感兴趣,可以去原文看看怎么实现的。
带有语法绑定的方法 在React Apps中 PureRenderMixin 通过检查和监听组件的props或state的变更来阻止一些不必要的重绘,这样能有效地改善应用程序的性能。
顺便说一句,Redux connect()的方法自动就能够判断是否需要更新组件,通过映射对象关联比较和判断状态是否发生了变化。
通过fat arrow syntax(箭头函数语法)) 你可以轻松的绑定javascript中的this对象到函数中,而且不需要考虑怎么绑定:
1 2 3 4 5 6 7 8 9 10 11 12 13 14 15 16 export class NumberPicker extends React.Component <any , any > { render ( return ( <p > <input type ="range" value ={this.props.value.toString()} min ="0" max ="255" onChange ={e => this.handleChange(e)} /> //new function created <label > {this.props.name}: </label > <b > { this.props.value }</b > </p > ); } handleChange (event ) { const e = event.target as HTMLInputElement ; this .props .onChange (parseInt (e.value )); } }
这样写的问题是类似在循环中声明函数一样,一旦属性无效后,箭头函数的声明就会被重新执行一次,这样就会有些性能方面的问题,一个简单地方式来改善这个问题,只需要这样定义你的箭头函数:
1 2 3 4 5 6 7 8 9 10 11 12 13 14 15 16 export class NumberPicker extends React.Component <INumberProps , any > { render ( return ( <p > <input type ="range" value ={this.props.value.toString()} min ="0" max ="255" onChange ={this.handleChange} /> //uses same function <label > {this.props.name}: </label > <b > {this.props.value}</b > </p > ); } handleChange = (event ) => { const e = event.target as HTMLInputElement ; this .props .onChange (parseInt (e.value )); } }
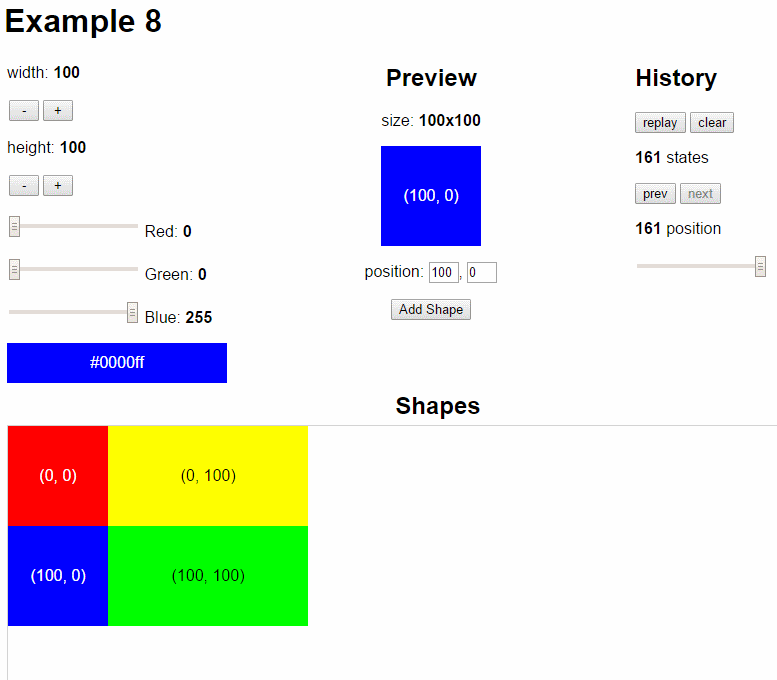
在这个实例中我们讲通过一个应用State快照更加完整实现替换ActionPlayer。通过使用state我们可以实现更加丰富的历史功能,包括回退,前进,和指定某个时间点的导航,就像我们控制进度条一样进行一次『实现旅行』体验模拟后退和前进
为了让历史状态管理更加可服用一点,它被封装成一个相似的API,包括基本的操作包括导航、重设,添加现在的状态等等:
1 2 3 4 5 6 7 8 9 10 11 12 13 14 15 16 17 18 19 20 21 22 23 24 25 26 27 28 29 30 31 32 33 34 var history = { states : [], stateIndex : 0 , reset ( this .states = []; this .stateIndex = -1 ; }, prev (return this .states [--this .stateIndex ]; }, next (return this .states [++this .stateIndex ]; }, goTo (index ) { return this .states [this .stateIndex =index]; }, canPrev (return this .stateIndex <= 0 ; }, canNext (return this .stateIndex >= this .states .length - 1 ; }, pushState (nextState ) { this .states .push (nextState); this .stateIndex = this .states .length - 1 ; } }; let store = createStore ( (state, action ) => { var reducer = reducers[action.type ]; var nextState = reducer != null ? reducer (state, action) : state; if (action.type !== 'LOAD' ) { history.pushState (nextState); console .log (history); } return nextState; }, defaultState);
通过保存和重置整个状态快照来实现我们的历史控制器,这非常的直接了当,基本上通过触发 LOAD action 来销毁之前保存的所有state,(注:这里没有像原文中使用装饰器,而是传统的方式,这组件有个问题,就是本身的数据并不是state的部分,但是又需要再state变化的时候,同步刷新,所以需要订阅store的变化来强制刷新):
1 2 3 4 5 6 7 8 9 10 11 12 13 14 15 16 17 18 19 20 21 22 23 24 25 26 27 28 29 30 31 32 33 34 35 36 37 38 39 40 41 42 43 44 45 46 47 48 49 50 51 52 53 54 55 56 57 58 59 import * as React from 'react' ;export default class History extends React.Component <any , any > { context : any ; static contextTypes = { store : React .PropTypes .object } private unsubscribe : Function ; componentDidMount ( this .unsubscribe = this .context .store .subscribe (() => this .forceUpdate ()); } componentWillUnmount ( this .unsubscribe (); } render ( return ( <div > <button onClick ={this.replayStates} > replay</button > <span > </span > <button onClick ={this.resetState} > clear</button > <p > <b > {this.props.history.states.length}</b > states </p > <button onClick ={this.prevState} disabled ={this.props.history.canPrev()} > prev</button > <span > </span > <button onClick ={this.nextState} disabled ={this.props.history.canNext()} > next</button > <p > <b > {this.props.history.stateIndex + 1}</b > position </p > <input type ="range" min ="0" max ={this.props.history.states.length - 1 } disabled ={this.props.history.states.length === 0} value ={this.props.history.stateIndex} onChange ={this.goToState} /> </div > ); } resetState = () => { this .context .store .dispatch ({ type : 'LOAD' , state : this .props .defaultState }); this .props .history .reset (); } replayStates = () => { this .props .history .states .forEach ((state, i ) => setTimeout (() => this .context .store .dispatch ({ type : 'LOAD' , state }), 10 * i)); } prevState = () => { this .context .store .dispatch ({ type : 'LOAD' , state : this .props .history .prev () }); } nextState = () => { this .context .store .dispatch ({ type : 'LOAD' , state : this .props .history .next () }); } goToState = (event ) => { const e = event.target as HTMLInputElement ; this .context .store .dispatch ({ type : 'LOAD' , state : this .props .history .goTo (parseInt (e.value )) }); } }
现在我们的实例已经支持丰富的历史功能了:)
Demo: /typescript-redux/example08/
如果正在给你的Redux应用程序添加撤销/重做功能,你肯定期望能够回退独立组件的变化的部分,而不是整个应用的state,非常幸运 这篇文章:redux docs have you covered 利用 Elm的undo-redo package 编写了一个撤销的实例。
注:原文中,作者还提供了一个多个客户端交互的示例程序,因为涉及到服务端的编码,主要是StackService本身(.NET的一个webapi框架)的实现,所以省略了,后续有空我再编写一个Nodejs实现的部分吧,如果机会的话。。我相信你懂的 ,或者可以先看下原文吧。

 ]
]